

Last Updated: October 29, 2026
Quick Summary
Run your warranty follow up as a dated written sequence: submit the claim through the required channel on Day 0, confirm receipt on Day 2, request a schedule on Day 7, escalate on Day 14, send a formal written demand on Day 21, and review outside options on Day 30. Keep every message in one email thread with the same claim number.
- Book an 11-month inspection before the one-year deadline so written notice arrives on time.
- Photograph each defect from far away and close up, and note the room, date, and what changed.
- Use one row per defect in a claim log and set a calendar reminder for each next follow-up date.
- Report urgent items like water intrusion and electrical hazards immediately by phone and in writing.
- A failed repair is the same claim still open, so update the original row with a recurrence entry.
Table of Contents
- Step 1: Know Your Warranty Periods and Deadlines
- Step 2: How to Document New Home Defects
- Step 3: Run the New Construction Home Warranty Claim Process
- Step 4: Use a Builder Warranty Request Template
- Step 5: Track the New Construction Warranty Repair Timeline
- Step 6: Prioritize Urgent, Safety, and Cosmetic Defects
- Step 7: When Repairs Stall or Defects Come Back
- Get Help Managing Your Warranty Follow Up
- Frequently Asked Questions
Step 1: Know Your Warranty Periods and Deadlines
Most new construction warranty follow up problems start with a missed date, not a bad builder. The new construction warranty follow up process only works if you know when each window opens and closes.
A builder warranty is a written promise from the builder to fix certain defects for a set time after closing. Coverage varies by provider, component, duration, exclusions, and claim process.
Typical windows in a new home warranty:
- 90-day warranty: often covers workmanship and cosmetic items found early
- One-year warranty: usually covers most workmanship and materials
- 11-month inspection: a professional inspection before the one-year deadline, so you can submit written notice in time
The 11-month inspection matters because notice requirements usually run on strict dates. If you want to know what to ask about an 11-month warranty inspection, start with the reporting deadline and required channel. You can also review what to check before a warranty deadline and what a new home builder warranty covers before you file anything.
Step 2: How to Document New Home Defects
Documentation wins claims. Builders respond to clear evidence, and vague complaints get pushed to the bottom of the repair schedule.
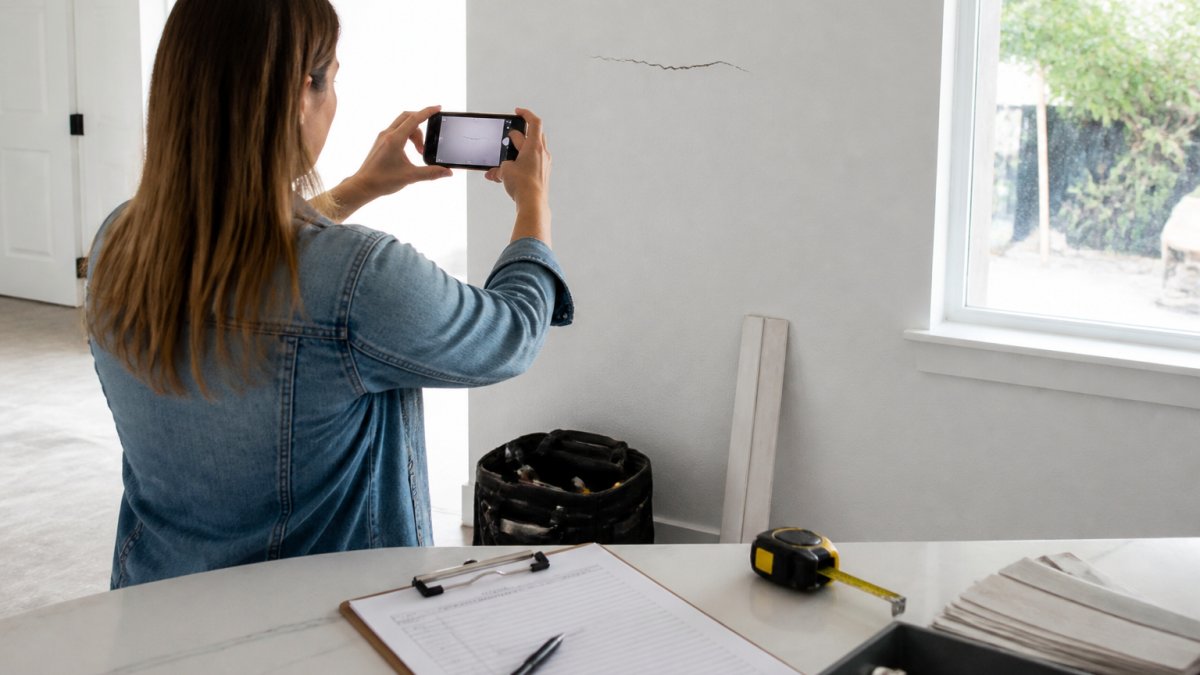
Here is how to document new home defects properly:
- Photograph each defect from far away, then close up
- Add a ruler or coin for scale
- Note the room, date, and what changed
A common mistake is sending photos by text message. Those messages can be hard to retrieve, and they may not satisfy a written notification requirement.
Step 3: Run the New Construction Home Warranty Claim Process
The new construction home warranty claim process has one rule above all others: submit in writing, through the required channel. But the rule is only the start. The part most guides skip is what happens between submission and repair, who is responsible at each stage, how long each stage should take, and what you do when a stage stalls.
First, identify who actually owns the claim
Before you submit anything, open your warranty documents and answer three questions:
- Who is the warranty administrator? Some builders handle claims in-house. Others may route claims to a third-party warranty company. The administrator is who you notify in writing, even if the builder performs the repair.
- Who performs the repair? Often the original subcontractor who installed the component. The builder or administrator schedules it; the trade does the work.
- Who do you escalate to? The warranty department, a customer service manager, or the administrator's claims line. Write the name and contact down before you file.
Match your message to the party who owns that stage of the claim.
Submit through the required channel
Most builders accept claims through a warranty portal, a dedicated email address, or a written form. Informal messages may not satisfy the documented reporting process. When you submit, include:
- Your name, address, and closing date
- A numbered list of warranty items with photos
- The date you first noticed each defect
Keep the confirmation. If the portal gives no receipt, follow up in writing the same day and ask for one. For step-by-step help, see how to submit a builder warranty request. The U.S. Department of Housing and Urban Development publishes homeowner resources on housing and buyer protections that are worth reading before a dispute.
The follow-up sequence most guides leave out
Written notice is step one. Follow-up is what moves a claim. Use this sequence, and adjust the intervals to whatever your warranty documents specify:
- Day 0, Submit. Send the written claim through the required channel. Save the confirmation or send a same-day email asking for one.
- Day 2, Confirm receipt. If you have no acknowledgment, send a short written follow-up referencing your original submission date and asking for a claim number.
- Day 7, Request a schedule. Ask for the inspection or repair date in writing. Reference the claim number.
- Day 14, Escalate one level. If there is still no schedule, write to the warranty department manager or the administrator's claims contact. Keep the same subject line and thread so the paper trail stays intact.
- Day 21, Formal written demand. State the defect, the original submission date, every follow-up date, and a reasonable response deadline. Ask for a written response, not a phone call.
- Day 30, Outside options. If the claim is still unanswered, review your contract's dispute process and the consumer-protection options in Step 7.
Keep every message in one thread
Use the same subject line for every message, for example, Warranty Claim [Number] - [Address], and reply within the same email thread. A single thread with dated messages is far easier to produce in a dispute than a scattered set of texts, portal screenshots, and phone calls. If you must call, follow up the same day with a short email summarizing what was said and who you spoke with.
What a good acknowledgment looks like
A useful acknowledgment includes a claim number, the items accepted for inspection, and a target inspection window. If the builder's response omits any of those, reply in writing and ask for them. An acknowledgment without a claim number is hard to track, and a claim you cannot track is a claim that stalls.
Step 4: Use a Builder Warranty Request Template
A builder warranty request template keeps your claim consistent and hard to ignore. Copy this and fill in the blanks:
Subject: Warranty Request - [Address] - Closing Date [Date]
Dear [Builder] Warranty Department,
I am submitting the following warranty items under my new home limited warranty:
- [Defect] - [Room/Location] - first noticed [Date]. Photos attached.
- [Defect] - [Room/Location] - first noticed [Date]. Photos attached.
Please confirm receipt within two business days and provide a repair schedule. I would like to schedule a builder inspection at your earliest availability.
Thank you, [Name] | [Phone] | [Email]
Send it by email and through the portal if both exist. Then log the date, time, and who you spoke with.
Step 5: Track the New Construction Warranty Repair Timeline
The new construction warranty repair timeline is where most homeowners lose momentum. A claim that sits unanswered is not a closed claim. The fix is a tracking system that captures every submission, response, appointment, and repair, and that flags the moment a claim goes quiet.
Build a claim log, not just a spreadsheet
A single spreadsheet works if it captures the full life of each claim. Use one row per defect, not one row per email, and include these columns:
| Field | What to Record |
|---|---|
| Claim number | Builder's reference or your own ID |
| Defect description | One line, with location and first-noticed date |
| Date submitted | Exact date and time |
| Channel | Portal, email, or written form |
| Acknowledgment | Date received and who sent it |
| Inspection date | Scheduled and actual |
| Repair date | Scheduled and completed |
| Repair outcome | Fixed, partial, or failed |
| Recurrence | Date the defect returned, if it did |
| Status | Open, scheduled, repaired, disputed, closed |
| Next follow-up date | The date you will check in again |
Add a second tab for a communication log: every call, email, portal message, and visit, with date, time, contact name, and a one-line summary. When a dispute arises, the communication log is often more persuasive than the photos.
Track failed repairs and recurring defects separately
A repair that fails is not a new claim. It is the same claim, still open. When a defect comes back, do not open a fresh row, update the original row and add a recurrence entry with the date, a new photo, and a note on what the prior repair involved.
Treating a recurring defect as a series of unrelated service calls can make it harder to show a pattern. Keeping the recurrence on the original claim preserves the history and makes escalation easier.
Know when a claim is actually closed
A claim is closed when the repair is complete and you have confirmed it in writing, not when the trade says it is done. After each repair, inspect the work, photograph the result, and send a short written confirmation or a written list of what remains. If the repair is partial, say so in writing the same day and ask for the remaining work to be scheduled under the same claim number.
Watch the response window
Confirm the response window in your warranty documents. If that window passes with no builder response, follow up in writing and reference your original submission date. If two follow-ups pass with no response, move to the escalation sequence in Step 3 and keep the same claim number on every message.
A simple weekly review
Once a week, open the log and do three things: check every open claim against its next follow-up date, confirm no deadline is closer than 30 days without a plan, and update the status of any claim where something moved. A short weekly review keeps the whole process visible and reduces the risk of a real defect being denied because follow-up lapsed before the window closed.
Step 6: Prioritize Urgent, Safety, and Cosmetic Defects
Not every defect deserves the same urgency, and treating them equally slows everything down. Sort your list into three tiers:
- Urgent: water intrusion, no heat or cooling, sewer backups, electrical hazards
- Safety-related: exposed wiring, loose railings, gas smells, mold
- Cosmetic: paint flaws, drywall cracks, uneven trim, minor flooring issues
Report urgent and safety items immediately, by phone and in writing. Cosmetic items can wait for the 11-month inspection, unless your warranty sets a shorter deadline for them. Cosmetic claims filed too late may be denied, even when the defect is real.
Step 7: When Repairs Stall or Defects Come Back
A repair that fails is not a new claim. It is the same claim, still open.
When a defect comes back, keep the original request, the repair description, and evidence of recurrence. If the builder stalls, escalate in writing to the warranty department and the original contractor, and keep a clean paper trail. What to do if a warranty repair does not resolve the issue walks through the evidence you need.
If talks break down, many states license contractors and run consumer protection offices. The Federal Trade Commission explains your rights around home improvement and warranty claims. Some buyers also use USA.gov consumer complaint resources to file a formal complaint.
Get Help Managing Your Warranty Follow Up
Warranty follow up is a paperwork job with real deadlines, and most homeowners are juggling it alone. At New Home Hub SWFL, we offer structured document review and warranty follow-up support. Our team reimburses third-party home inspections at closing, up to $500.
Get started with New Home Hub SWFL and keep every warranty claim on schedule, in writing, and on record.
Frequently Asked Questions
How often should I follow up with a builder about a warranty repair?
Send a written follow-up every 7 to 10 business days until you receive an acknowledgment of receipt. A polite check-in at the two-week mark is reasonable. Keep every message in the same email thread or portal so you build a written record. If nothing moves after three follow-ups, escalate to the warranty department manager and restate the deadline and defect in writing.
What should I include in a new construction home warranty claim?
Include your name, address, closing date, and warranty period in the header, then list each defect with its location, date first noticed, and photos. Reference the specific warranty provision you believe covers the item. Add a clear request for inspection and repair, plus a response deadline. This structure mirrors a builder warranty request template and makes the claim easy for the warranty department to log and route to the original contractor or subcontractor.
Should I hire an independent inspector before submitting warranty claims?
Yes, an independent inspection before your 11-month mark gives you a professional inspection checklist and photographs to support claims before the one-year warranty expires. A home inspector documents defects in a format builders recognize, which strengthens your written notice. Schedule it around month 10 so you have time to submit claims and follow up before the deadline, and keep the report with your other written records.
What should I do if my builder does not respond to a warranty request?
Send a written follow-up that restates the defect, the date of your original notice, and the response time you expected, then request acknowledgment of receipt within a set number of days. Copy the warranty department and your original sales contact. If the silence continues, review your state's notice requirements and homeowner rights, and consider consulting a qualified attorney. A claim-tracking log of every message and date makes any later dispute far easier to support.
